


How to use agar pots!
Our agar pots are one of our favourite products, they give you access to some decent mycology techniques without the need for a still air box. Below we will take you through step-by-step some of the potential uses for your agar pots.
Before you start
Have a shower
I can literally smell you from here, your friends are too nice to say anything. That was a joke. However your body is a big source of disgusting contamination, so cleanse it and pop on some fresh clothing.
Close the windows
Airborne contam is an issue when doing inoculations of any type. We don't want some piece of shit mould riding in on the tip of your syringe. Close windows and door whilst working.
Clean surfaces
Using 70% isopropyl or surface bleach spray, wipe down your work surface.
Spray onto a paper towel rather than spraying directly on to the surface.
Watch our instructional video
Germinating spores
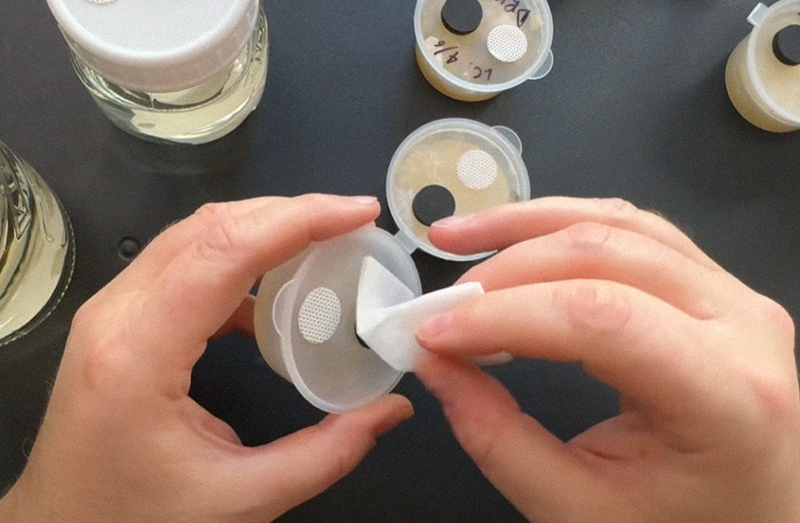
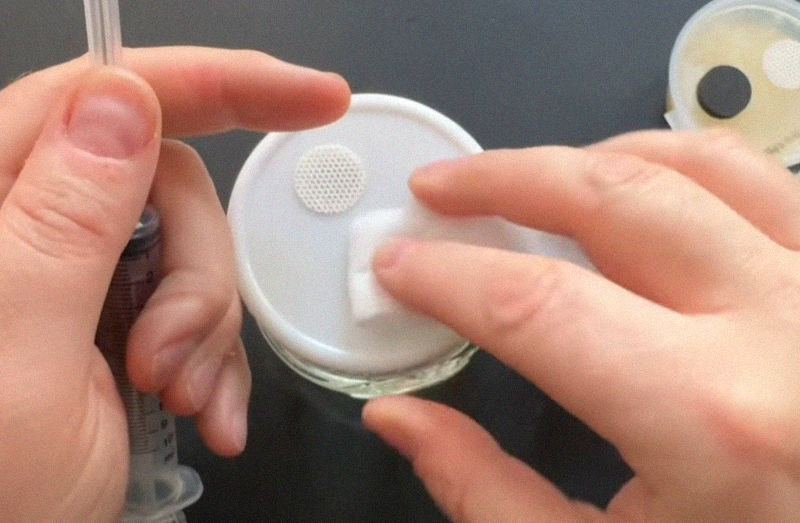
Wipe the port
Using your wipe, give the black injection port a wipe.
Allow the port to dry before inoculating.
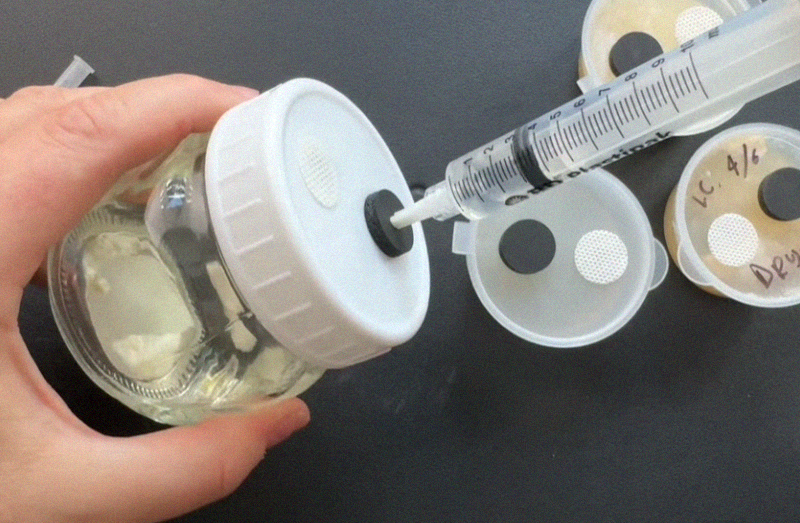
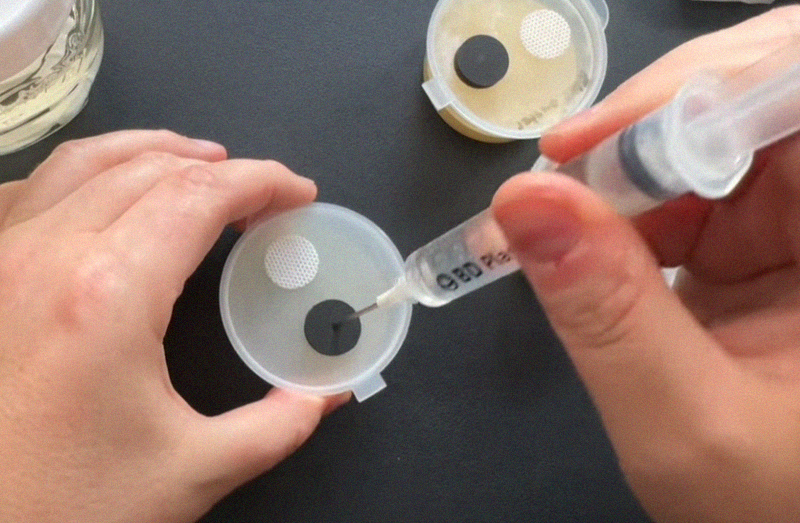
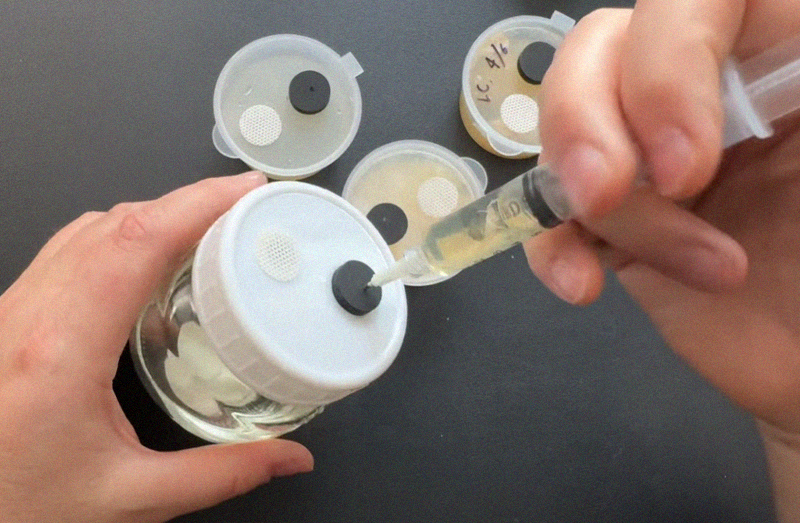
Inoculate
Slowly push your spore syringe (with a fresh sterile needle) into the centre of the port enough to clear the port but not so far as to touch the agar surface.
Carefully inject a few drops onto the surface of the agar and remove the syringe.

Label & Incubate
Label your pot with the date and note which species / phenotype you have in there.
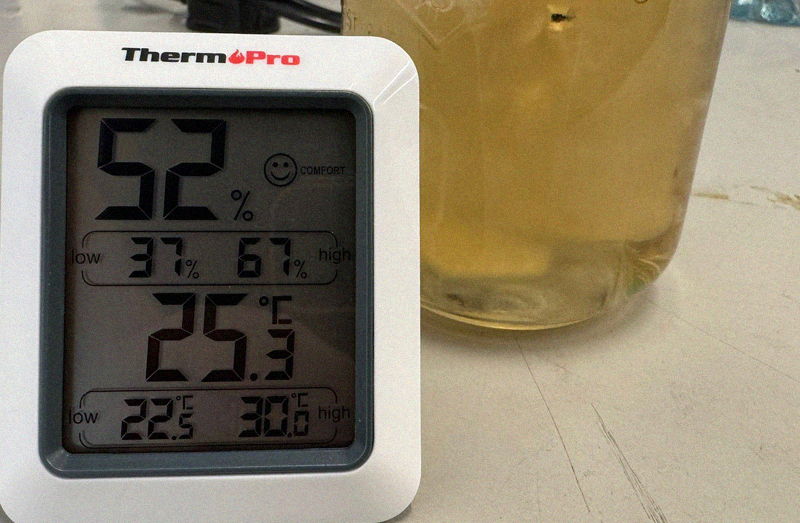
Find a nice warm place like your airing cupboard to incubate your spores.
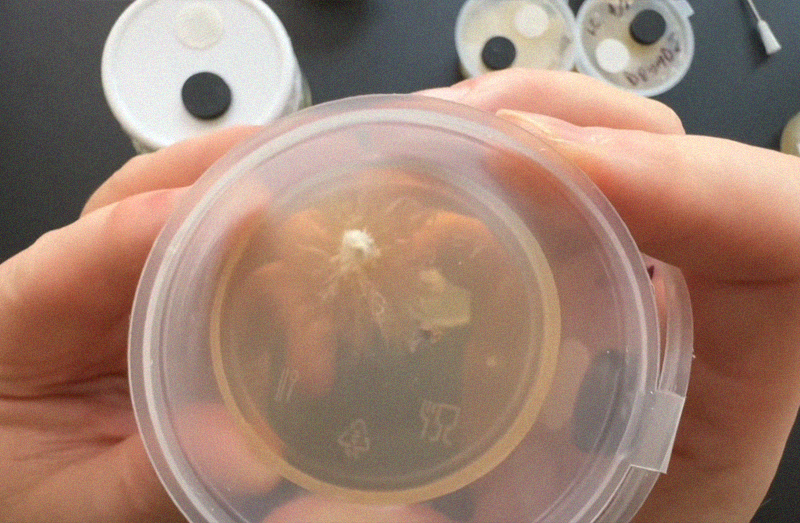
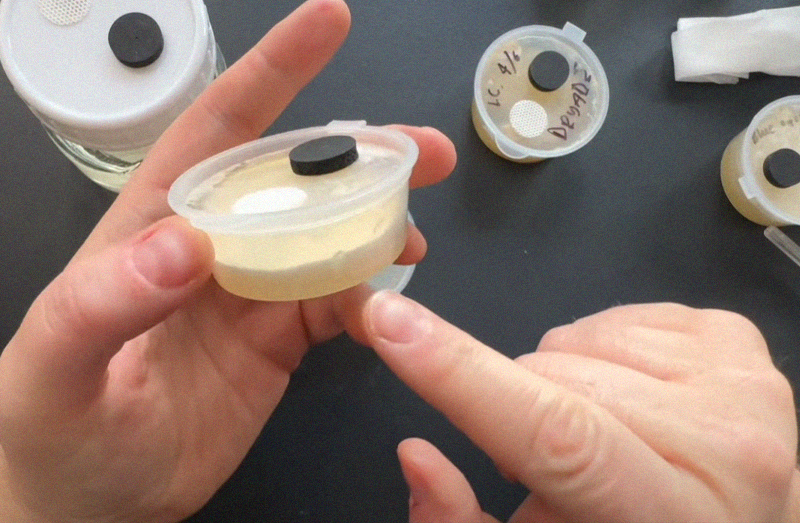
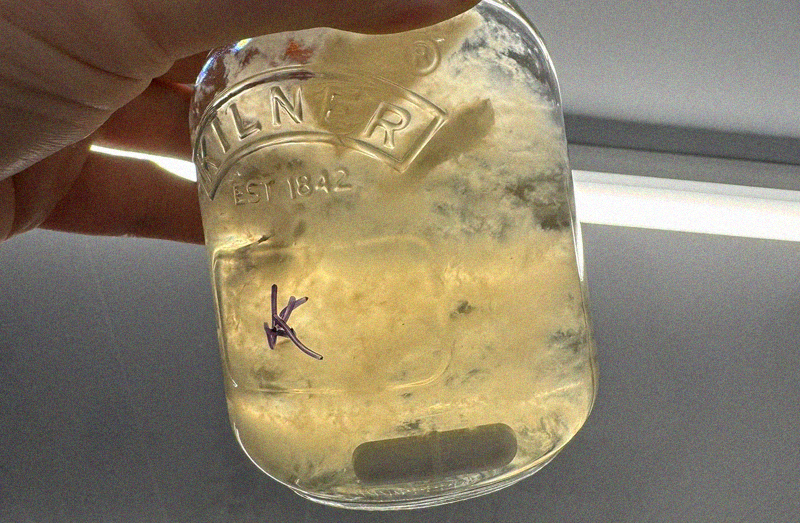
Myceliate
After about a week you should start to see mycelium growing inside your pot! If things look odd you can see our quick guide to contam below.
*Don't open the pot btw, I only opened it in the photo so you can see what's going on!
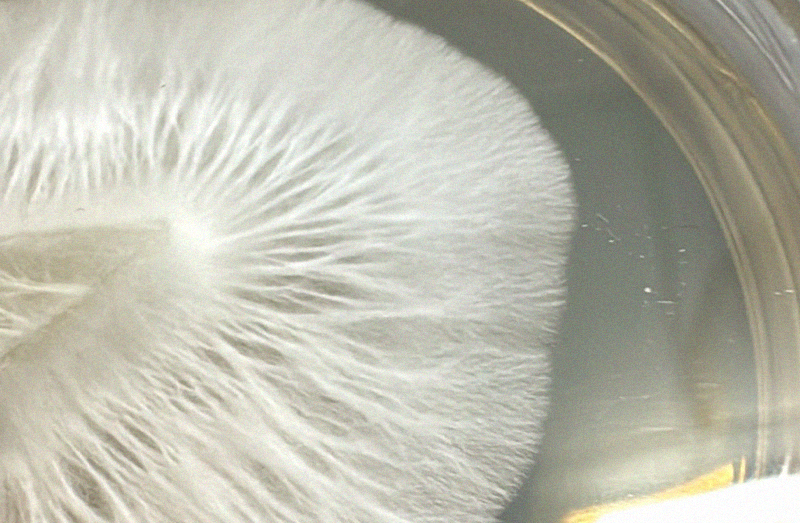
Rhizomorphic vs Tomentose
Depending on the species or phenotype you are working with you could
experience either of these types of mycelium. The common misconception is that
rhizomorphic mycelium produces better outcomes with Psilocybe species. This isn't the case.
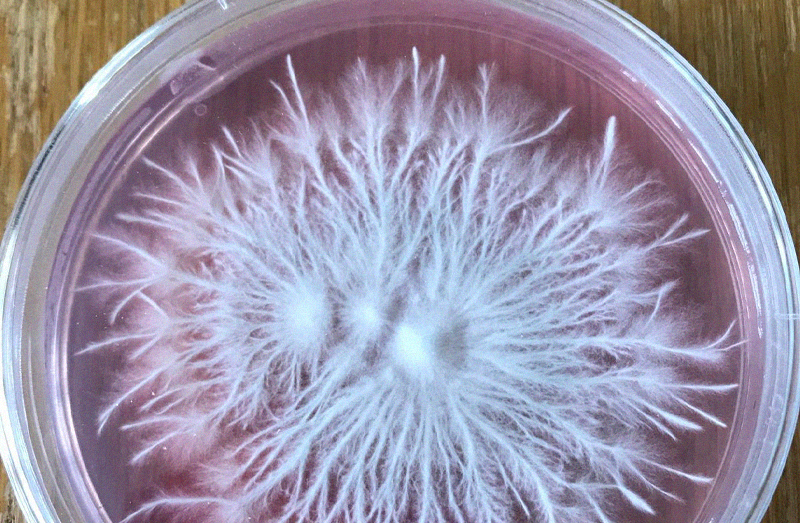
Sometimes mycelium will switch between both modes, this often relates to the
nutrient profile of your substrate.
Quality testing LC / spore solution
Basically the same process as above. But this time we are monitoring the outcome for contamination rather than just growing mycelium.
Step 1: Wipe the port
Using your wipe, give the black injection port a wipe.
Allow the port to dry before inoculating.
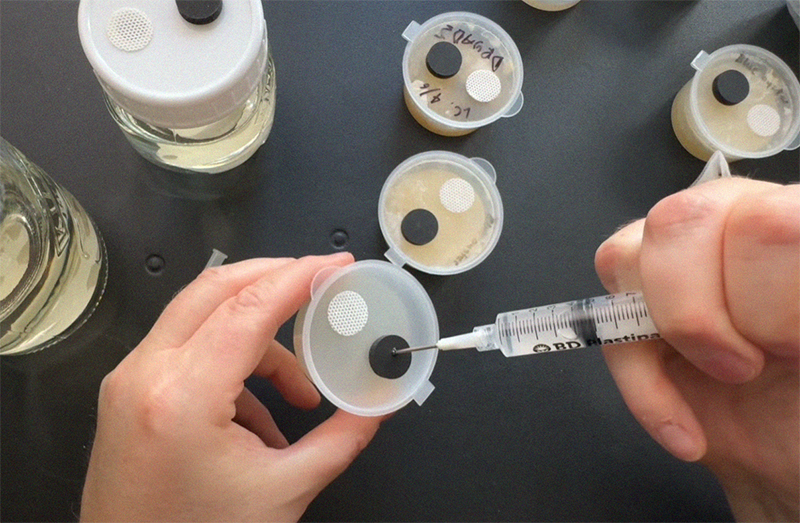
Step 2: Inoculate
Slowly push your spore syringe (with a fresh sterile needle) into the centre of the port enough to clear the port but not so far as to touch the agar surface.
Carefully inject a few drops onto the surface of the agar and remove the syringe.
Step 3: Label & incubate
Label your pot with the date and note which species / phenotype you have in there.
Find a nice warm place like your airing cupboard to incubate your spores.
Step 4: Check results
After about a week you should start to see mycelium growing inside your pot! If things look odd you can see our quick guide to common contam below.
*Don't open the pot btw, I only opened it in the photo so you can see what's going on!
Transferring to liquid culture jar
For this process you will need some sterile liquid culture media which you can either make yourself or buy here from us!
For this process you will need the following:
- Sterile syringes & needles
- Colonised Agar pot with some nice mycelium
- Sterile liquid culture jar
Wipe your ports
Using your wipe, give the black injection port a wipe on both the LC jar and the agar pot.
Allow the port to dry before injecting.

Draw up liquid media
Using a fresh sterile syringe and needle. Draw up a full syringe of liquid culture media.
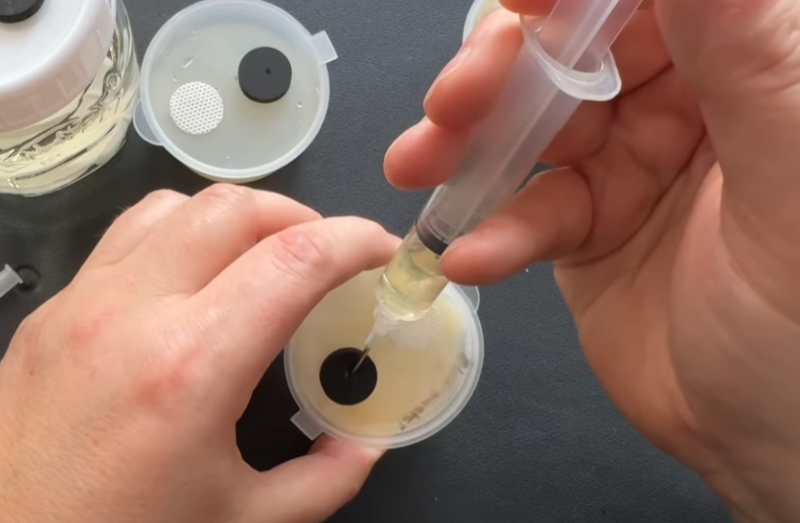
Flood the pot
Very slowly inject the full syringe of liquid culture media into your agar pot onto the surface of the mycelium. If you do this too fast you will pop open the pot or pop off the port.
Incubate
Find a nice warm place like your airing cupboard to incubate your liquid culture.
Check the pot daily and swirl the liquid to speed up colonisation.
LC ready!
After a few days (3-5 days) you should see mycelium in the liquid. We are now ready to draw up and inoculate our main jar. You could also test the LC using another pot (see process above) and then use the syringe to inoculate grain bags directly!
Draw up liquid culture
Re-wipe your ports on the pot and the jar.
Using a new sterile syringe and needle Gently draw up the liquid from inside the pot. Things might get stuck a little you can push out some liquid and draw bag up if anything gets lodged in the needle.
Inoculate the jar
Hopefully you've drawn around 5-10ml of LC into the syringe in the previous step.
Very slowly inject the syringe of liquid culture into your liquid culture jar. If you do this too fast you might damage the port.
Incubate the LC
Find a nice warm place like your airing cupboard to incubate your liquid culture.
Check the pot daily and swirl the liquid to speed up colonisation or use a magnetic stirrer.
Visual Check
After a week or two you should have visible mycelium suspended in your liquid culture media! Hold it up to a light to give a visual check for obvious contamination.
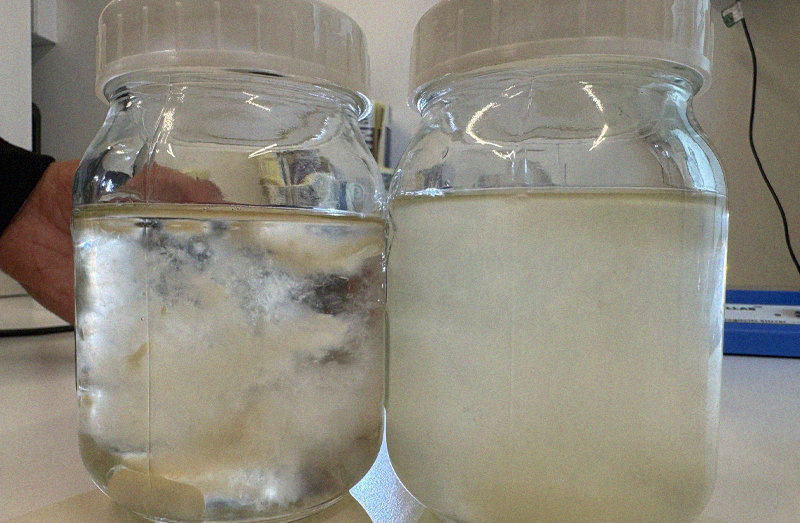
Bacterial Contam!
Your liquid culture should not be cloudy as this indicates bacterial contamination. Note the left jar is clear liquid with suspended mycelium the right is bacterial as heck.
Quality testing
Before you use your liquid culture, run it through the quality testing workflow we outlined above. This will save you a lot of wasted time and energy!

You've done it!!
You've made liquid culture! Now to see how quickly it tears through your grain. I'm really proud of you.
Common contamination guide
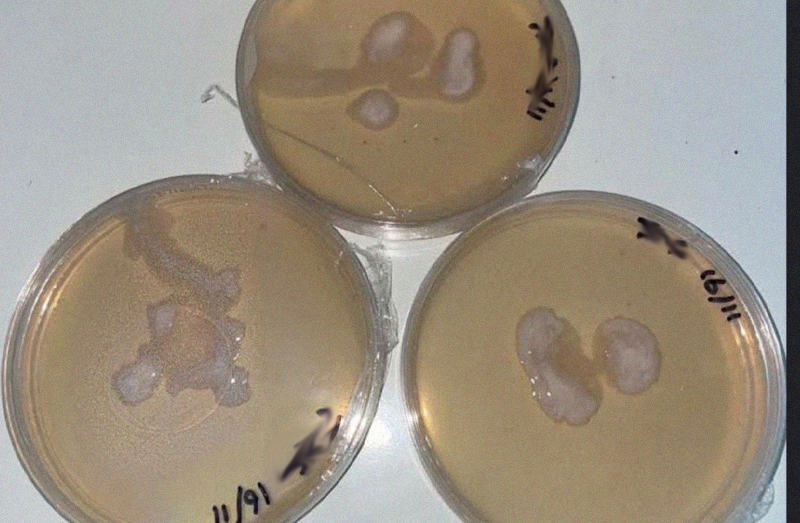
Bacterial
Does it look like someone has pleasured themselves into your agar? This is bacteria. This is not generally salvageable unless there is a clear separation of your mycelium and the bacterial colonies.
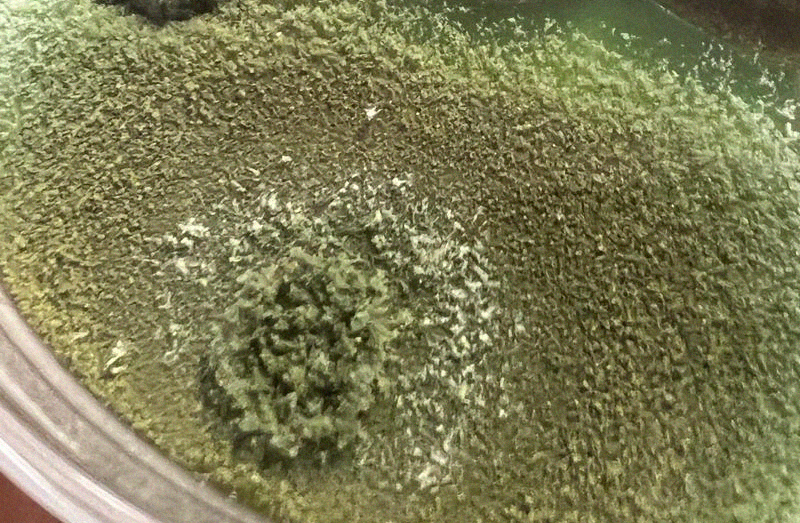
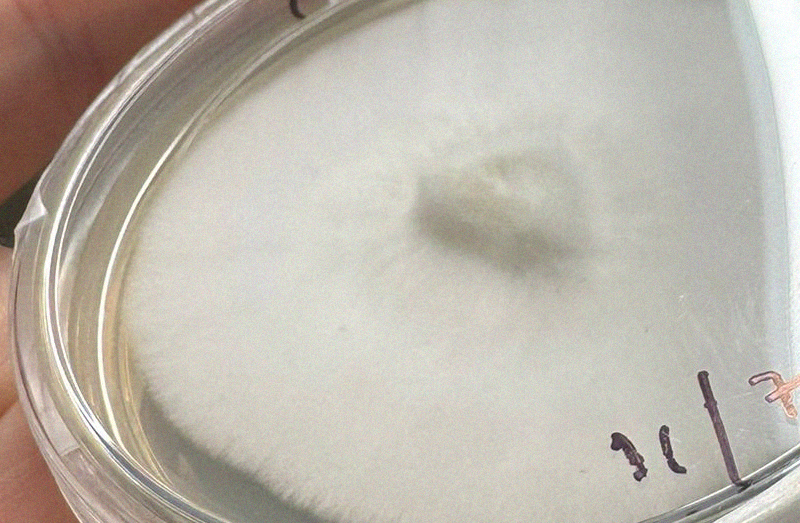
Trich
Trichoderma (or trich as we call it) is a fairly common airborne contaminant and often easy to deal with on agar unless it's been left so long it's producing a tonne of fruiting body mess like the photo above.
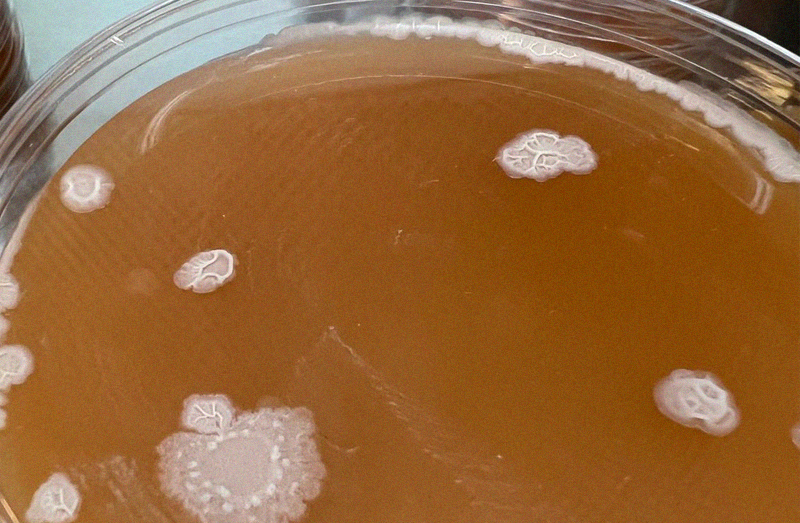
Yeast
Another super common airborne contamination. This often can come from humans as we are covered in this lovely beer & bread making organism.
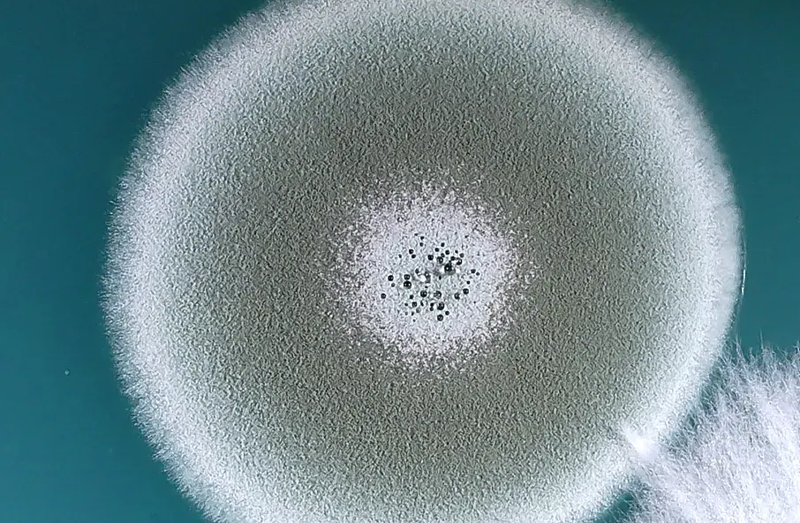
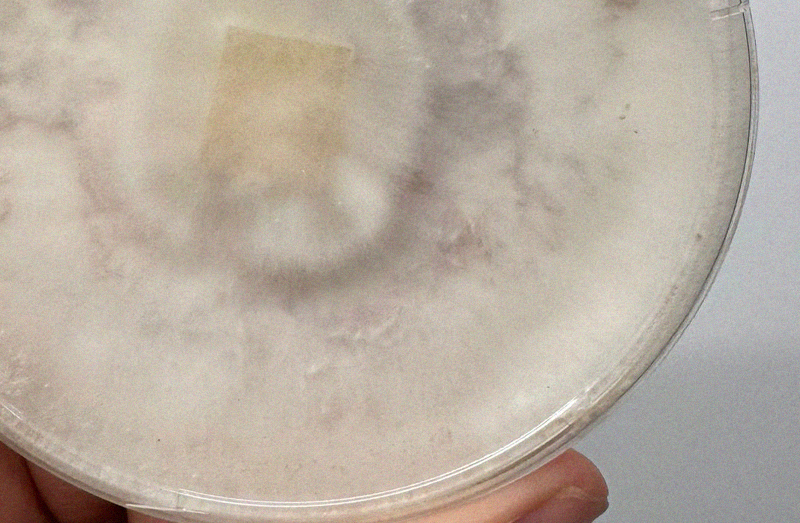
Penicillium
Aren't you a modern day Alexander Fleming. You've discovered something which arguably saved more human lives than anything else around. Don't go eating it if you get a boo-boo though (there are more steps than that to make penicillin).
Need support along the way?
Things don't always look exactly as expected, if you want some advice or second opinions on anything at all, you can get help from our team and the community!