


How to use a monotub to grow mushrooms
"With greater surface area comes greater mushroom crops." - Uncle Ben
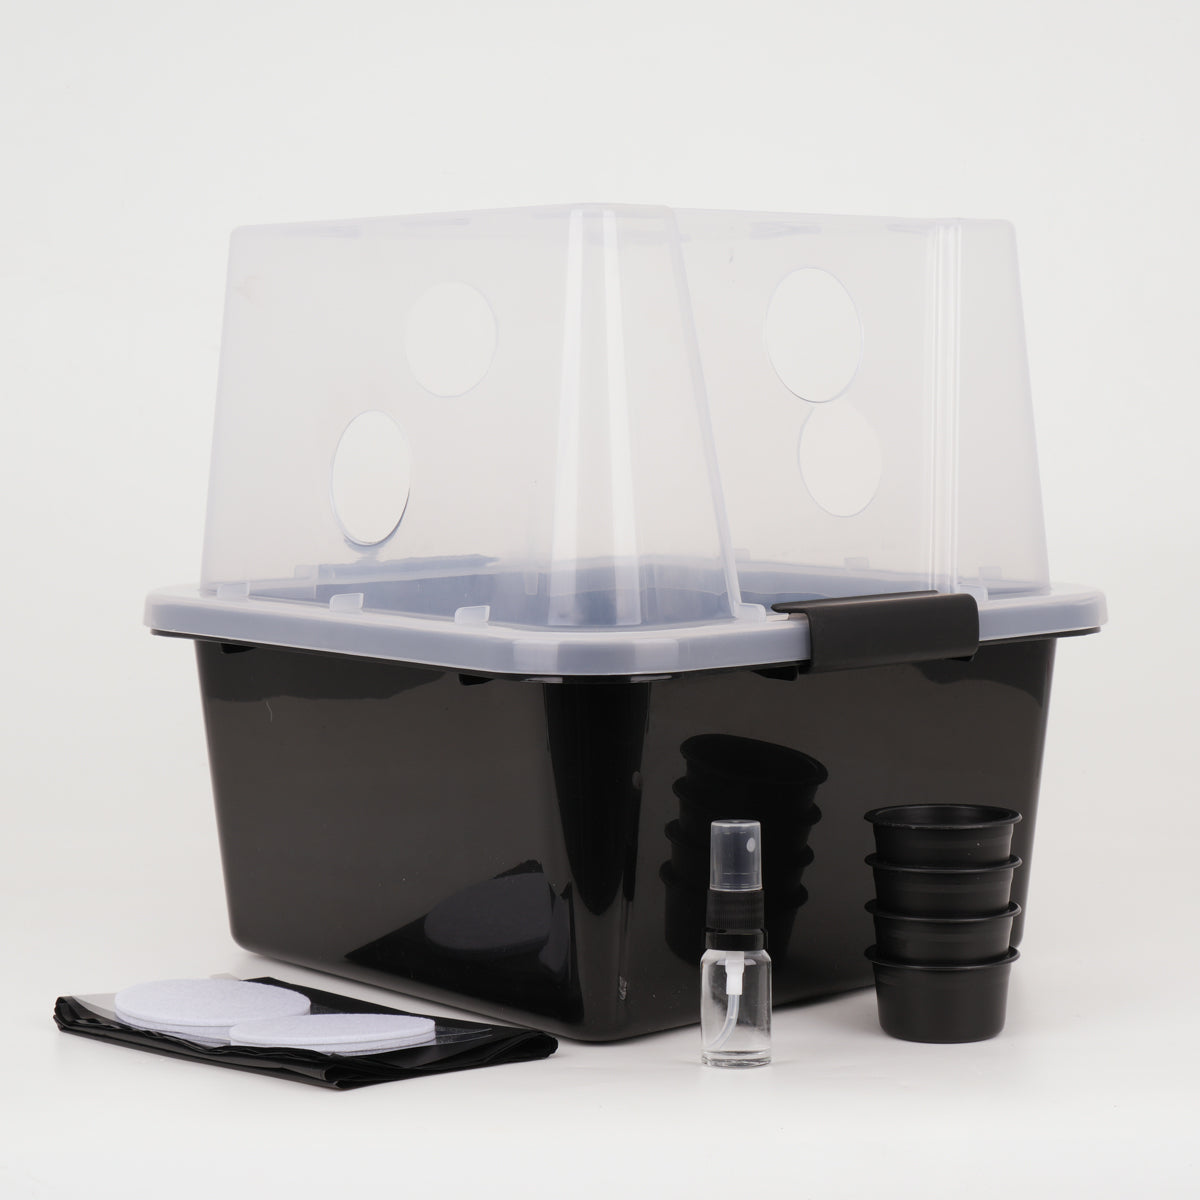
The f*ck is a monotub?
Simply put, a monotub is a plastic tub with some air holes cut in the sides to allow you to create the ideal environment to grow mushrooms.
The biggest upside is the increase in surface area which means if dialled in, you can expect a lot more mushrooms per crop.
Which monotub should I use?
This is a quick comparison for the Microppose monotub, you can see the sizes, skill level and volume of grain and substrate required.

|

|

|
|
|
1kg Grain + 2kg CVG |
1.5kg Grain + 3kg CVG |
2kg Grain + 4kg CVG |
|
|
L:30.5 x W:30.5 x H:30.5 cm |
L:45.72 x W:38.1 x H:30.48 |
L:57.15 x |
|
|
Easy |
A little harder |
A little harder still |
Lets make some grain spawn
The below guide requires you to be able to make some grain spawn.
You should follow this guide before you start the below steps!
Preparing the tub
1. Clean the tub
Using your little iso bottle, give the black side of your tub a spray down and do the same with your lid and the black plugs.
2. Add your liner
That black plastic bit in with the order isn't a bin liner. Neatly position your liner in the bottom half of the tub and fold it out to fit the inside of the tub.
3. Spray the liner
As we did the tub at the start with the tub, give the now positioned liner a spray down with your ISO spray and allow to dry.
4. Plug ur holes m8
Included in your kit you'll find some 2.5" filters and some black plugs. Push the black plug into all of the holes in your monotub (4 for small tub, 6 for med & large).
Did you know? We introduce fresh air when everything has finished colonised to initiate mushrooms to start growing. That's why we restrict fresh air using plugs until the substrate is fully colonised.
Adding your grain spawn and substrate
4. Break up your grain spawn
Carefully massage your grain spawn bag as much as possible, the more time you spend breaking up as granular as possible the better colonisation you will get of the substrate.
5. Add grain to substrate
Pair text with an image to focus on your chosen product, collection, or blog post. Add details on availability, style, or even provide a review.
6. Mix well
Pair text with an image to focus on your chosen product, collection, or blog post. Add details on availability, style, or even provide a review.
7. Pour into your monotub
Pair text with an image to focus on your chosen product, collection, or blog post. Add details on availability, style, or even provide a review.
Did you know? Side pinning is when mushrooms start growing below the substrate surface. We can avoid this by keeping preventing fresh air from accessing the sides of our tub.
Good conditions, create good mushrooms
8. Tamp down the surface
Carefully massage your grain spawn bag as much as possible, the more time you spend breaking up as granular as possible the better colonisation you will get of the substrate.
9. Don't forget to edge 👀
Using the blade of your hand (karate chop) you should tamp down a margin around your substrate to slightly compact the substrate which meets the edge of your tub. This will help prevent side pinning.
10. Waiting around
Now we wait for the substrate to be fully colonised by the mycelium. How long will this take? It depends on many factors
12. LEAVE IT ALONE
Don't start opening the tub every 20 mins to see if things are ready for fruiting. The tub is clear for a reason. Just be patient, when your substrate is fully colonised we can get into fruiting.
Lets fruit some mushrooms!!
12. Fresh air (Add your filters)
Remove the black plugs and add your white filters. They are sticky around the outside and will prevent gnats and other contam from accessing your tub whilst your mushrooms are growing.
13. When to spray
Your substrate contains enough moisture to take you through to fruiting your first flush. Check your tubs in the mornings, if there is no condensation inside feel free to lightly mist the insides of the tub (NOT THE SURFACE OF YOUR SUBSTRATE).
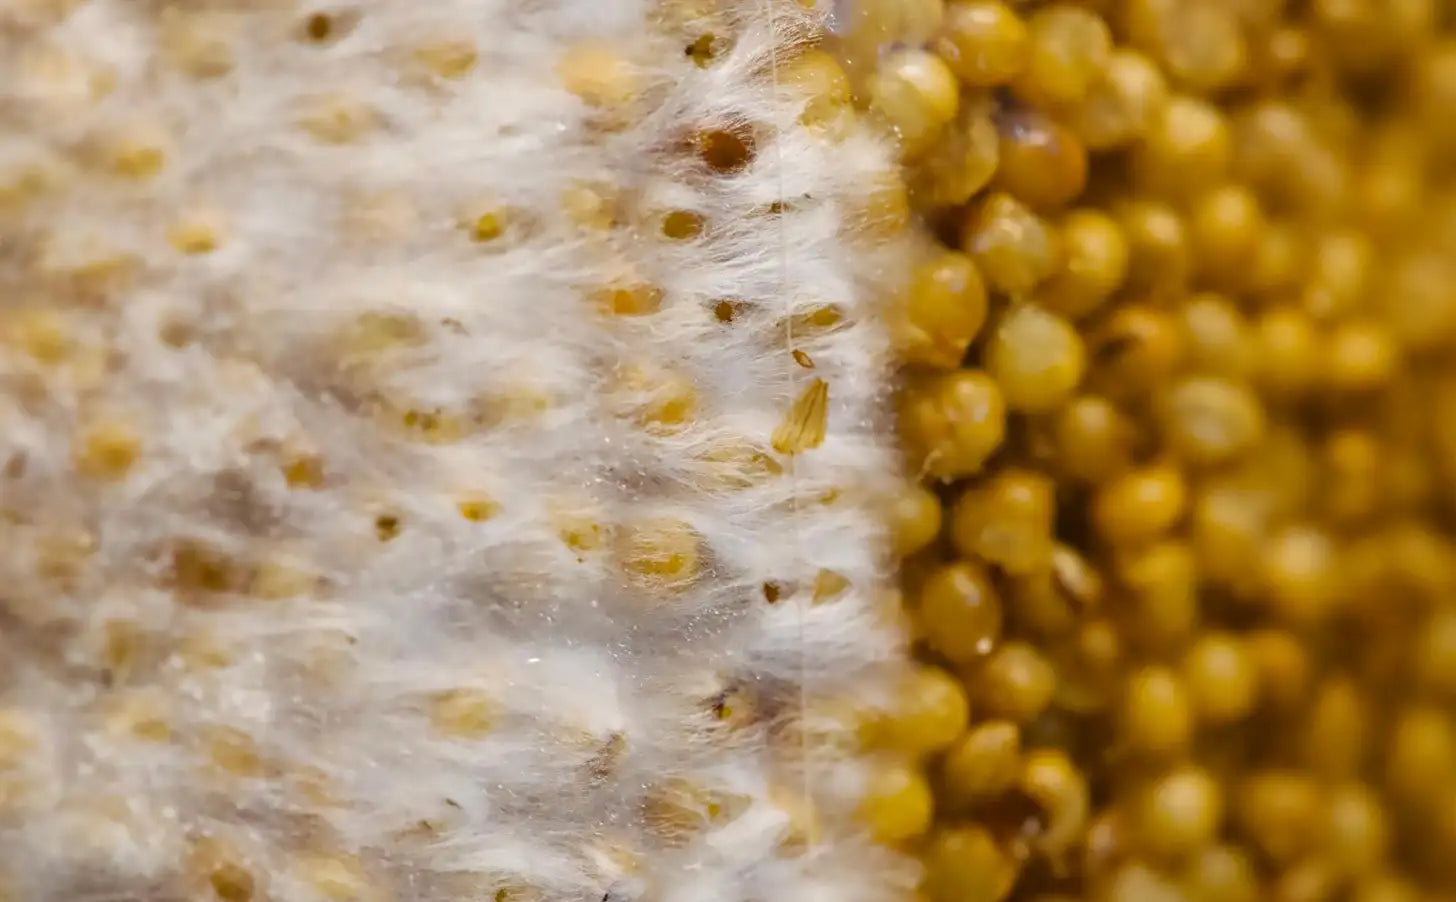
14. Knots & Pinsets
After a week or so you'll notice little white dots on your substrate (hyphal knots) this is
15. Harvest!
Don't start opening the tub every 20 mins to see if things are ready for fruiting. The tub is clear for a reason. Just be patient, when your substrate is fully colonised we can get into fruiting.
Second flush
Rehydrating the cake
Remove the black plugs and add your white filters. They are sticky around the outside and will prevent gnats and other contam from accessing your tub whilst your mushrooms are growing.
Dab dry the surface
Your substrate contains enough moisture to take you through to fruiting your first flush. Check your tubs in the mornings, if there is no condensation inside feel free to lightly mist the insides of the tub (NOT THE SURFACE OF YOUR SUBSTRATE).
14. Knots & Pinsets
After a week or so you'll notice little white dots on your substrate (hyphal knots) this is
15. Harvest!
Don't start opening the tub every 20 mins to see if things are ready for fruiting. The tub is clear for a reason. Just be patient, when your substrate is fully colonised we can get into fruiting.
Troubleshooting
I think I have contamination
I think I have contamination
Fill in the text content of the collapsible item here. You can provide details and explanation for the question here.
Mycelium looks very thick and dense on the surface
Mycelium looks very thick and dense on the surface
Fill in the text content of the collapsible item here. You can provide details and explanation for the question here.
Substrate looks dried out
Substrate looks dried out
Fill in the text content of the collapsible item here. You can provide details and explanation for the question here.